Don’t let installing flooring intimidate you! Check out these tips for installing laminate flooring and an update on week three progress on our One Room Challenge.
Wow! What a week!
So, as I mentioned last week, my husband and I flew off to California for four days while he had two weeks off before starting a new job. We had planned on coming home and tackling the bedroom right away, but, well, it turns out my family decided to all get sick. So while they all snuggled on the bed that was moved to our living room, I got to work painting and pulling up carpet.
Okay, maybe it wasn’t that dramatic because my husband had bursts of energy and helped as he could, but for the most part he hung out with the kids and I just worked like crazy on the bedroom before he started his new job on Monday.
Thursday I painted and Justin removed moulding, Friday I did paint touch ups, pulled up all the carpet, and we did a massive shopping trip at Home Depot. Saturday we went to IKEA and bought way too much black and white decor that I am in love with(!!!), and Sunday we started installing flooring!!
Note to self: Read flooring packaging before planning your room transformation timeline! Our flooring needed to sit in the room for 48 hours to acclimate before installing. Oops!
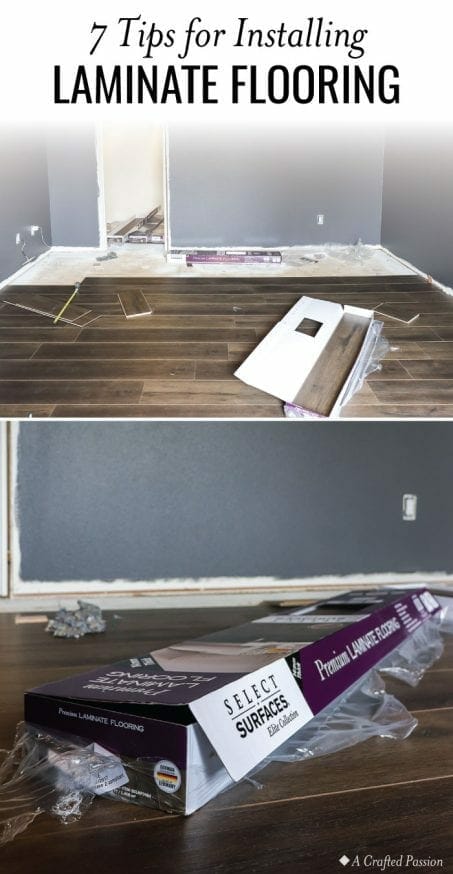
HUGE thanks to Select Surfaces for providing the gorgeous laminate flooring for our bedroom makeover! All opinions are my own and I would never recommend something I don’t completely love. I legit love this flooring SO MUCH! For more info on my policies, read my full disclosure here.
I was really torn on whether we do new flooring or stick with the beige carpet we had. I have always been intimidated by the idea of putting in new floorings and was nervous how it would turn out, but ultimately my hate for the carpet won!
Well, turns out I had nothing to be concerned about!
Here’s what our room looked like a week ago….

And here’s midway through flooring install.

WHAT?! Looks so good!!
Check out this little timelapse video I put together showing the progress on the floors. My 3.5 year old ended up having three days of on and off 102-103 degree fever so needed extra snuggles. We still found the time to sneak in flooring install during naptime and after the kids went to bed.

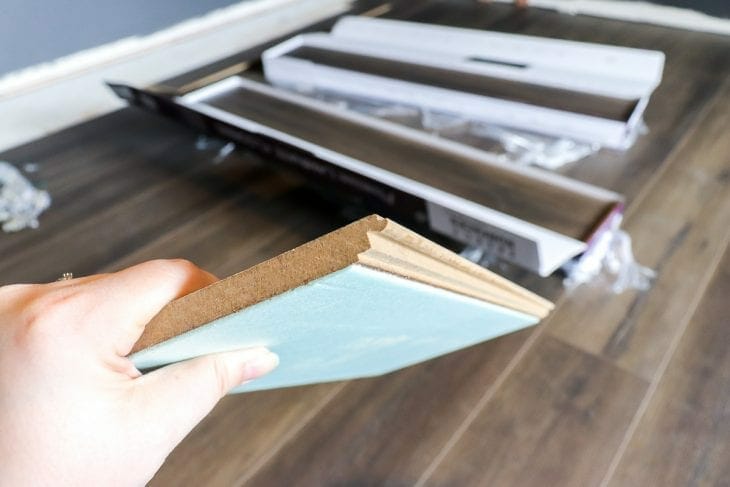
Each plank has foam backing attached so all we had to do was install it directly on top of the subfloor. Saves us time and money! I’d say that’s a win.
Plus, the click system makes it SO easy to install! The two sides of the planks have different grooves so you can snap it all together. No tapping or banging planks to get it to fit all together.

Tips for Installing Laminate Flooring
1. Prep subfloor before installing laminate flooring. This include remove all staples, nails, or rough areas. If needed, sand down any rough spots that may have shown up from removing tack strips or staples. Any inconsistencies could potentially mess up your flooring installation.
2. Remove moulding if you are able. We were going to try installing the flooring without removing the moulding, however, once we pulled up the carpet we realized the moulding would have to be moved lower anyways so we pulled it up before installing the flooring and it makes installing the floor so much easier.
3. Make sure and have enough spacers to go between the flooring and the walls to account for expansion. It’s helpful to place them where two boards are joined together and on each end so that you don’t get off track with how much space is between the flooring and the wall.

4. Plan ahead. If you are able, it’s helpful to draw our your boards to get an idea of what type of layout you want. Ideally, you want 16″ between where two boards join on adjoining rows to make the flooring the strongest. Also, you might want to rip down your first row so that your last row doesn’t end up being just 1″ wide. Make sure and account for overlap when doing these measurements

5. Once you start laying flooring, don’t force a board down! Pay attention to any resistance as you work to click it into place. You might have an angle wrong or there could be dirt or sawdust stuck in the joint.
6. Alternate using boards from different boxes so that you get a good variation of baords and it looks more natural.
7. When you order flooring, make sure and buy at least 5% more than you think you’ll need to account for those small pieces you cut off that can’t be used or when you cut the wrong end of the board.

Laminate flooring isn’t really difficult and is much more cost-effective than hardwood. Our flooring is stunning and we have already received so many compliments on it on social media!

We got the Urbanwood extra wide planks from the Elite Collection at Select Surfaces and I HIGHLY recommend it to anyone who is looking to update their floors! You can order your own laminate flooring from Sam’s Club right here.
Now for a weekly progress update! Here’s the updated list with a few additions and updates from last week.
Project List:
- Install board and batten & paint
- Paint ceiling SW Bright White
- Paint walls SW Peppercorn
- Remove carpet
Install new flooring- Paint doors SW Tricorn Black
- Switch closet door to open into room
- Add new baseboards and door trim
- Install new ceiling fan
- Makeover current headboard
- Figure out dresser organization
- Install wall sconces
Build two nightstands (bought two nightstands instead)- Organize closet
- Make art with our wedding vows
- Hang new curtain rod and curtains
- Accessorize!
I’m hoping to paint the doors, install all the new moulding and trim and board and batten tonight, and then hopefully move our bed back into the bedroom. From there I’ll be able to paint the board and batten, and then start putting the room all back together.
I can’t wait to see it all start coming together!

![]()
Check out all the rooms that are being made over at One Room Challenge right here and be sure to check back next week on the progress!
![]()
The floors look great!! I can’t wait to see all of the amazing black and white items from IKEA! I’m a sucker for black and white!
Thanks, Ruthie! Me too!!
Side note…painting without baseboards on is my favorite kind of painting!
Seriously!! The BEST!!
Aww, hopefully everyone’s on the mend right now! The floors look great. Nice instructions too, Amanda! Good luck with the rest of the progress. Can’t wait to see.
Thanks, Tee! My 3yo is still fighting it, but the others are feeling better, so I’ll take it.
LOVE the new floors! They look amazing! Can’t wait to see the rest of the room come together!!!
Thanks!! I’m OBSESSED with them!
Your floors look amazing! Hope everyone is feeling better now!
Thanks Emy!! My 3.5 yo is still fighting it, but the others are on the mend.
Your floors turned out amazing! We did new floors a few years ago in our whole house and it’s a huge transformation. I love what you chose, it will be a great backdrop for the rest of the room. I’m glad you are all feeling better again, being sick with kids is the worst. I can’t wait to see your finished room!
Your floors turned out amazing! That gray brown color is stunning!
I hope everyone is feeling better and your floor looks amazing!! I can’t wait to see all those IKEA goodies!
Hope y’all are on the mend. The flooring is beautiful though! Great job.
Love your new floors – they look awesome with your wall colour! Hope everyone is feeling better :)
Wow, you guys made that look easy! I will have to look into trying this particular flooring. I have been wanting to do this in my craftroom/momcave and now thinking about doing the entire upstairs. My kiddos are so tough on the carpet. Can not wait to see more!